
Running an Analysis
The Image Analysis screen is where you point RaceTagger at a folder of photos and
have it detect race numbers, match them to participants, and (optionally) write
metadata and extract visual tags. You pick the folder, the sport category, and an
optional participant preset, tune a handful of advanced settings if you need to, then
click Analyze Folder. A live progress panel tracks the run image by image; you can
cancel it mid-run, and if the app or your machine goes down before it finishes, the
next launch offers to resume from where it stopped instead of re-processing (and
re-charging) everything. The recognition engine itself — how numbers are actually
detected and matched — is covered in recognition-pipeline; the sport-category
presets that tune it live in sport-categories. Reviewing and acting on the finished
results is covered in results-and-review.
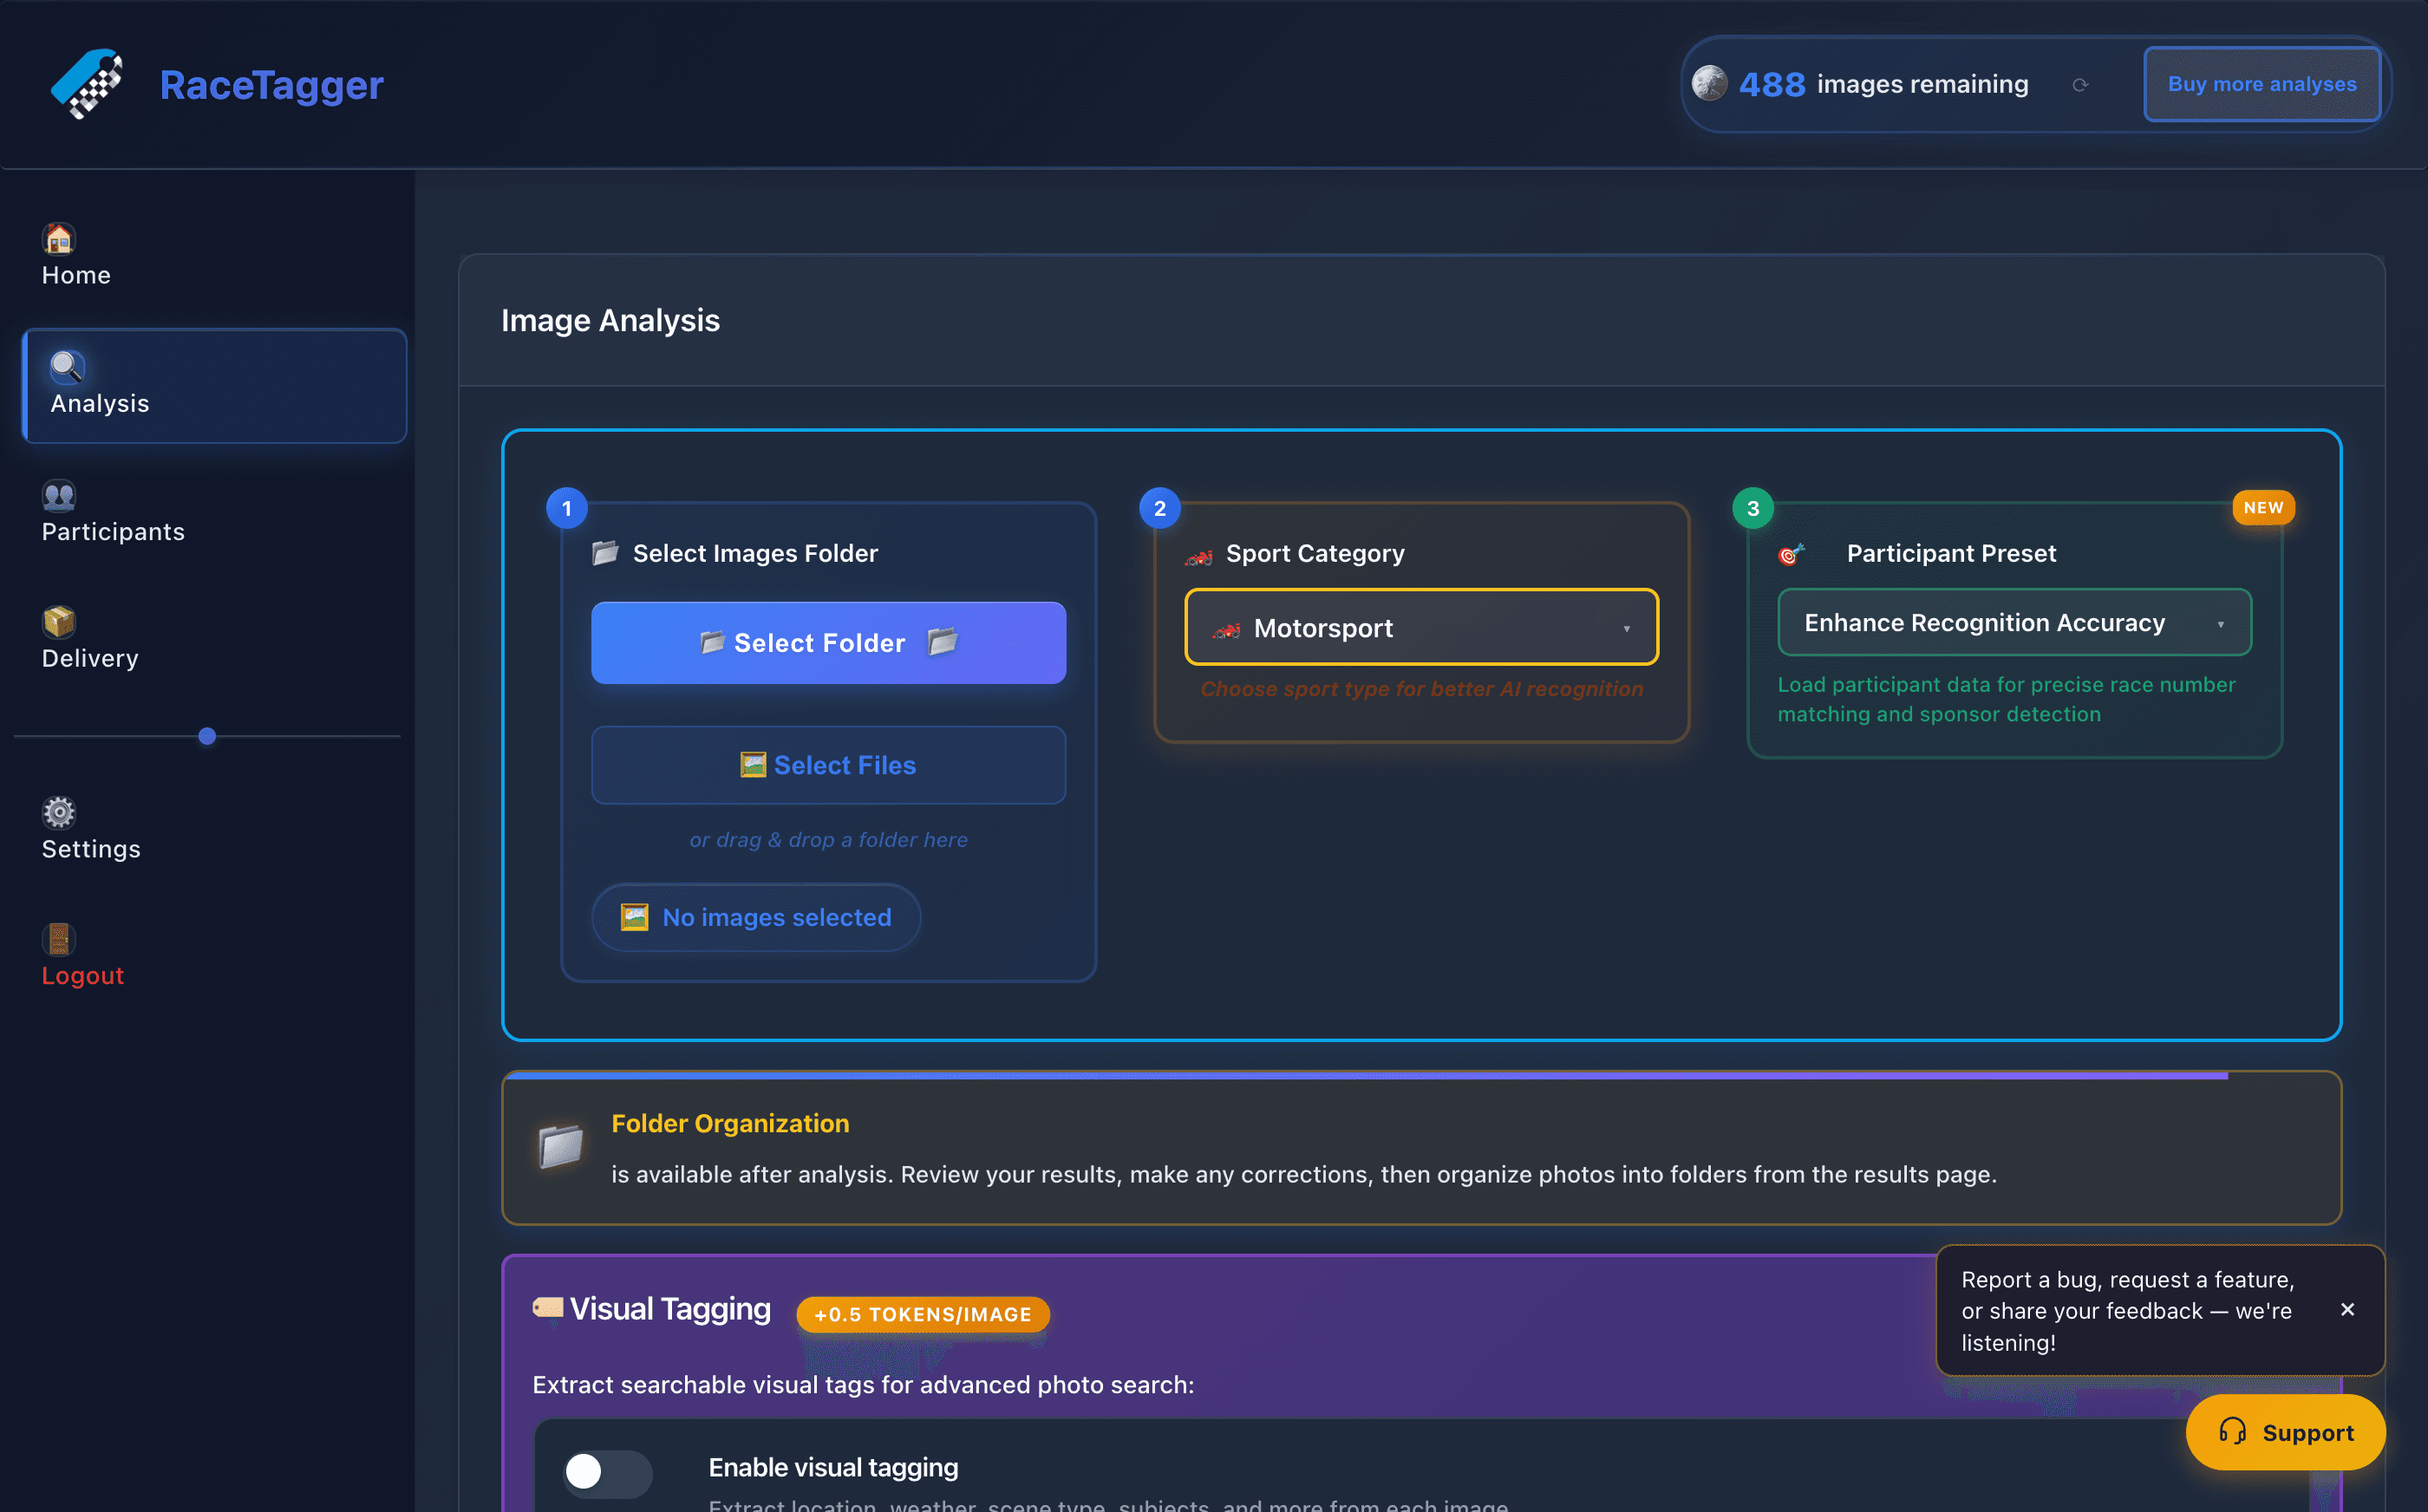
How to use it
- 1Select Images Folder: (step 1): click 📂 Select Folder to pick a folder, or 🖼️ Select Files to pick one or more image files (RaceTagger analyzes the whole folder they live in). You can also drag & drop a folder onto the page. The image count for the selection is shown under the picker.
- 2Sport Category: (step 2): pick a category from the dropdown — this tunes the AI for the type of race number it should expect. The list is filled at runtime from the server-side sport_categories list, so it depends on your account/app version; see sport-categories for what each one changes.
- 3Participant Preset: (step 3, optional): pick a saved preset from Participant Preset to load a participant list for precise number-to-name matching and sponsor detection. Once one is loaded, the panel shows how many participants it contains and a Manage Presets link.
- 4Optionally, Link to Project if the project selector is shown — this auto-routes delivered photos to project galleries…: after analysis.
- 5Optionally, toggle Enable visual tagging to extract searchable tags (location, weather, scene, subjects, style…: , emotion) from each photo, and Embed tags as IPTC Keywords to also write them into the file's metadata. Visual tagging runs in parallel with recognition and costs extra tokens per image (see the badge next to the toggle for the current rate).
- 6Optionally, open Advanced Options for: - Analysis mode — FAST, BALANCED, or ADVANCED, trading speed/cost against accuracy (see the option text in the dropdown for the current figures). - Starting List — upload a CSV of the starting list, or download the CSV template first. A CSV metatag column, if present, is always used for image metadata matching regardless of the setting below. - Metadata Management — don't add metadata, use a default metatag (filename + date), enter a metatag manually, or embed all analysis results as metadata; plus separate Overwrite keywords / Overwrite description switches for how existing IPTC fields are handled. - Upload Optimization — resize large images before upload (the originals on disk are never modified) using the Fast, Balanced (recommended), or Quality preset.
- 7Click Analyze Folder to start: RaceTagger remembers your model, category, preset, folder-organization, visual-tagging, metadata, and upload-optimization choices and pre-fills them the next time you open this screen.
- 8While it runs, the Processing Images… panel shows: current image / total count, percentage complete, an ETA, a progress bar, the current file being analyzed with a status icon, and per-run telemetry (average time per image, elapsed processing time, throughput).
- 9Click Cancel in the panel at any time to stop the run: Already-processed images keep whatever results and metadata were written; the rest are left unanalyzed.
- 10If a run is interrupted (app crash, force-quit, machine restart, or a Cancel) before it finished, it shows on the Home…: screen's Recent Analyses list with an amber ⚠ Interrupted badge and a ↻ Resume analysis button on that row. Clicking it (or the row itself) opens a confirmation dialog explaining that only the not-yet-analyzed photos will be processed and charged; Resume analysis there restarts the run in the background and takes you straight to the live progress view on this screen.
- 11When the run finishes, RaceTagger moves you on to review the results — see results-and-review for what happens there…: , including folder organization, which only becomes available once analysis is done.
Limits and known behaviour
- Resume only works on the device that has the original run's local log. The desktop keeps a local per-execution log of which images actually succeeded; resume rebuilds the remaining work from it. If that log is missing or unreadable on this device (a different device ran the original analysis, a reinstall, or the file was deleted/corrupted) while the server shows progress was made, RaceTagger refuses to resume — silently re-processing could double-charge you — and tells you to re-run the analysis from the folder instead. The same applies if the original folder path is no longer known on this device.
- Executions completed or interrupted on another device show a "☁ Cloud" badge on Home instead of "Interrupted" — there's no local data to resume from, so Home offers an informational message rather than a resume action.
- Only successfully analyzed images count as "done" for resume purposes — an image that errored during the original run is retried, not skipped.
- Cancel stops the run but does not undo what already happened: images already analyzed keep their results and any metadata already written; the run is left interrupted and can be resumed later like any other interrupted run.
- The Advanced Options panel's "Enable/pause/resume" concepts only apply to
starting, canceling, and resuming a whole run — there is no way to pause a run
mid-flight and continue it in the same session; a legacy pause/resume control exists
in one progress-overlay component (
enhanced-progress.js) but the app never fires the events it listens for, so it has no effect. - Folder Organization is explicitly not available from this screen — it only appears as a post-analysis action on the results page.
- Supported input formats, per the in-app onboarding content: standard JPEG/PNG, and RAW formats NEF (Nikon), ARW (Sony), CR2/CR3 (Canon), ORF (Olympus), DNG (Adobe).