
Results & Review
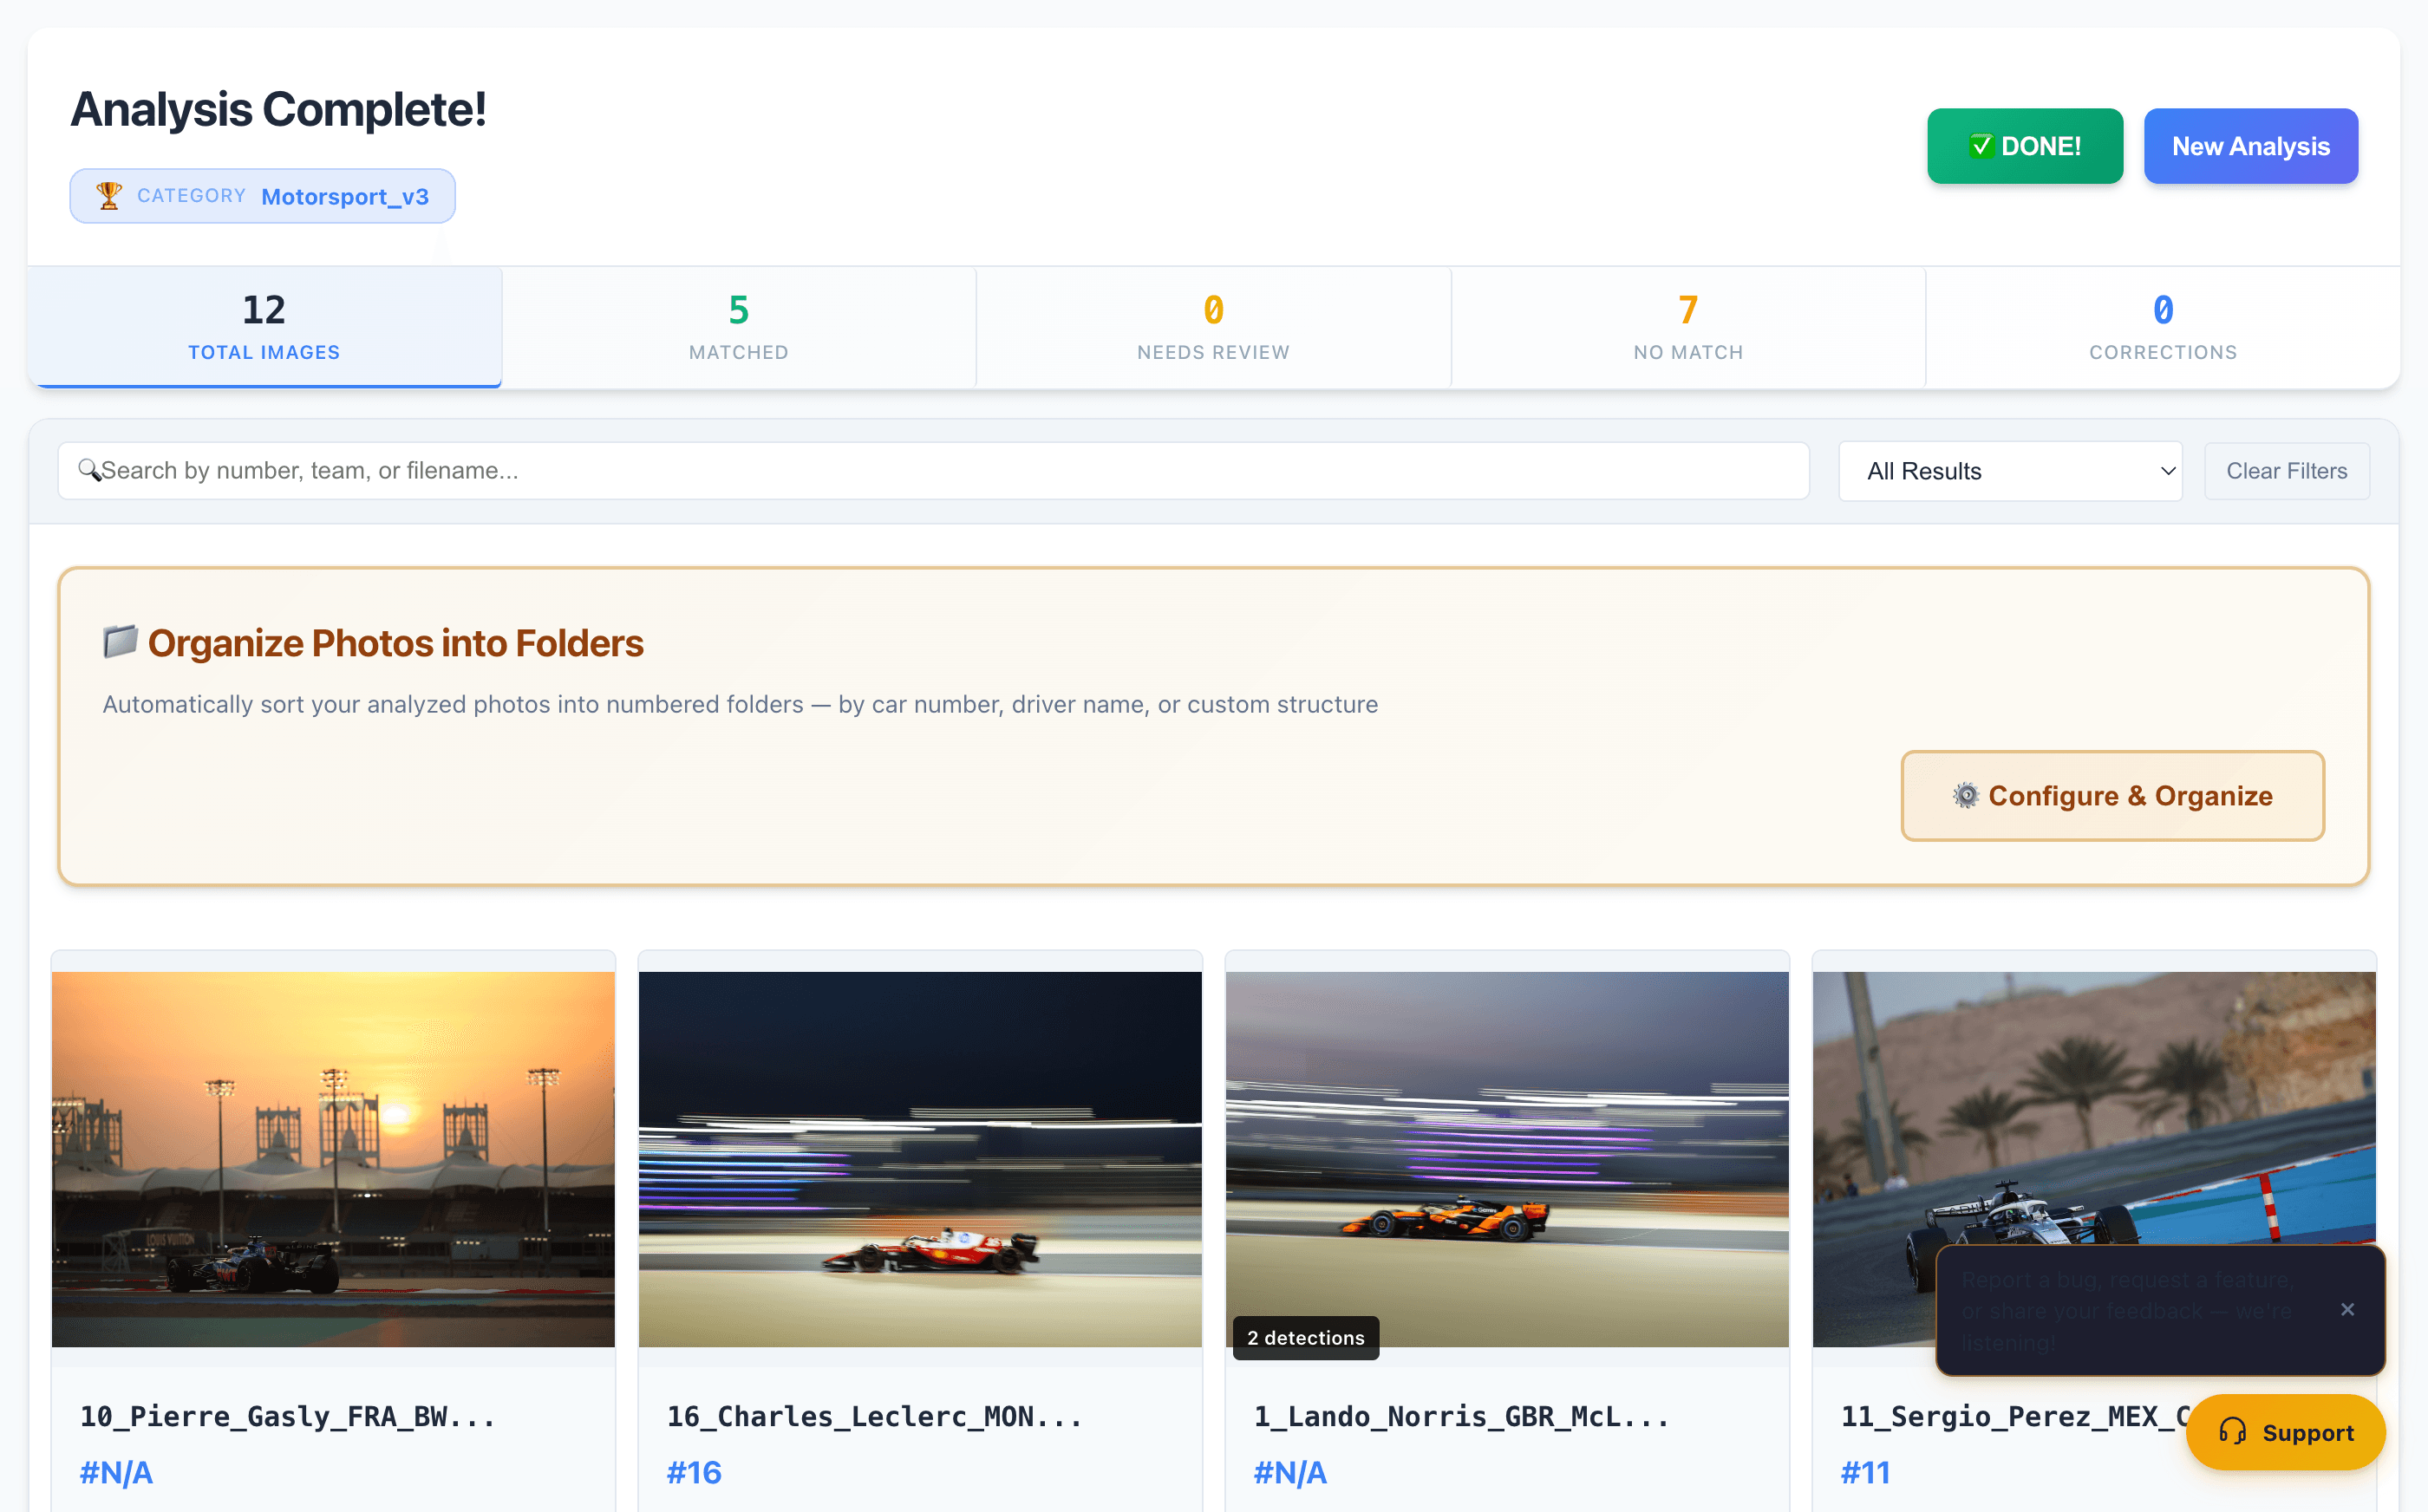
After the AI finishes processing, the results page shows every photo with its detected race number, team, driver, confidence score, and any visual tags. This is where you review matches, correct mistakes, and prepare for folder organization.
After an analysis finishes, the Results page shows every photo with its detected race number, team, driver(s), confidence, and any visual tags, in a scrollable thumbnail grid. Five summary counters — Total Images, Matched, Needs Review, No Match, and Corrections — give an instant read on the batch. Opening a photo shows the full-size image with zoom/pan, a bounding-box overlay of what the AI actually detected, and an editable Recognition Results panel per vehicle where a number, team, or driver can be corrected on the spot. When an ambiguous match or a preset-improving pattern is found, RaceTagger surfaces it for a one-click decision instead of silently guessing.
How to use it
- 1Browse and filter: Use the search box ("Search by number, team, or filename...") to find a photo, or the filter dropdown to narrow the grid to All Results, Matched Only, ⚠️ Needs Review, No Match Only, Manually Corrected, High Confidence (>90%), Low Confidence (<70%), or No Metadata Written. Clear Filters resets both.
- 2Open a photo: by clicking its thumbnail. The counter (e.g. "101 / 149") shows your position in the batch; ←/→ (or the on-screen arrows) move to the previous/next photo without closing the view.
- 3Zoom and pan: with the on-screen − / 100% / + / fit-to-view controls, the mouse wheel, drag-to-pan, or double-click to zoom in; the detection overlay stays glued to the image while you zoom.
- 4Read the overlay: Detected boxes are drawn on the photo: a recognized subject shows its number/name and confidence, a detected-but-unread subject is labelled "not read", and an unmatched or too-small face is labelled accordingly. Press B (or use the gallery toggle) to show/hide the overlay; a chip reports how many results have no box to draw. The setting persists per device (Settings) and can also be turned off for the session only.
- 5Correct a detection: Click into the Race Number or Drivers field and type; both fields save the correction and advance to the next photo on Enter. Space jumps straight into the Race Number field. Shift+Enter goes back one photo from any field. Edits made while moving between multiple detections in the same photo (↑/↓) are auto-saved as you move off each entry — no explicit Save click needed.
- 6Add a missed detection: Every photo always shows one trailing empty entry at the end of its detection list — type a number into it to create a new detection (a fresh empty entry then appears after it). Move between entries with ↑/↓.
- 7Delete a detection: Click its trash icon — it is removed immediately with no confirmation dialog; a toast appears with an Undo button to put it back.
- 8Resolve an ambiguous match: A photo flagged ⚠️ Review shows a candidate panel with the tied alternatives, each with its car/vehicle model shown so you can pick the right one at a large event. With the keyboard, digits 1–9 pick the candidate at that position and 0 means "none of these" (only active on needs-review photos).
- 9Open the shortcuts helper: Click ⌨ Want to review faster? · Discover the keyboard shortcuts, or press ?, for a cheat-sheet of every key above, grouped by Move around / Edit the number / Pick a suggestion / See what the AI saw / Done. Esc (or the backdrop/✕) closes it.
- 10Act on "Useful Data Found.": When you click DONE! or Start New Analysis, RaceTagger may open a modal proposing preset improvements: per-participant suggestions and, at the top, a dedicated 🏁 Championship / series sponsors section (pre-checked when a sponsor covers ≥70% of the event's cars) so a series-wide sponsor like a tire or oil brand stops being matched to every car. Update Preset applies your selections; Skip (or ✕, or clicking outside) dismisses it for that analysis only — it will not auto-pop again for the same execution, but the ✨ Improve Preset button reopens it on demand.
- 11Export or organize: 📤 Export & IPTC renames, organizes into folders and/or writes IPTC metadata (see the Folder Organization and Metadata/IPTC pages); the Deliver button sends photos to a client gallery and can upload HD originals. ✅ DONE! returns to the home screen; New Analysis starts a fresh batch.
Limits and known behaviour
- The digit shortcuts (1–9, 0) for picking a candidate only work on photos flagged needs-review — on any other photo a pressed digit is ignored if there is no candidate at that position.
- The detection overlay is drawn from whichever bounding-box data the result carries; a result that has no box at all is called out in a "results have no box" chip rather than silently omitted.
- Single-driver tagging from a recognized face (the "Full lineup / per-driver" chip picker for multi-driver cars) depends on face recognition, which is gated per account and marked "in testing" — see For developers.
- Corrections are queued through a local, durable outbox before being written to the backend (see For developers); a correction is not lost to a flaky connection, but it can still take a retry cycle to land.