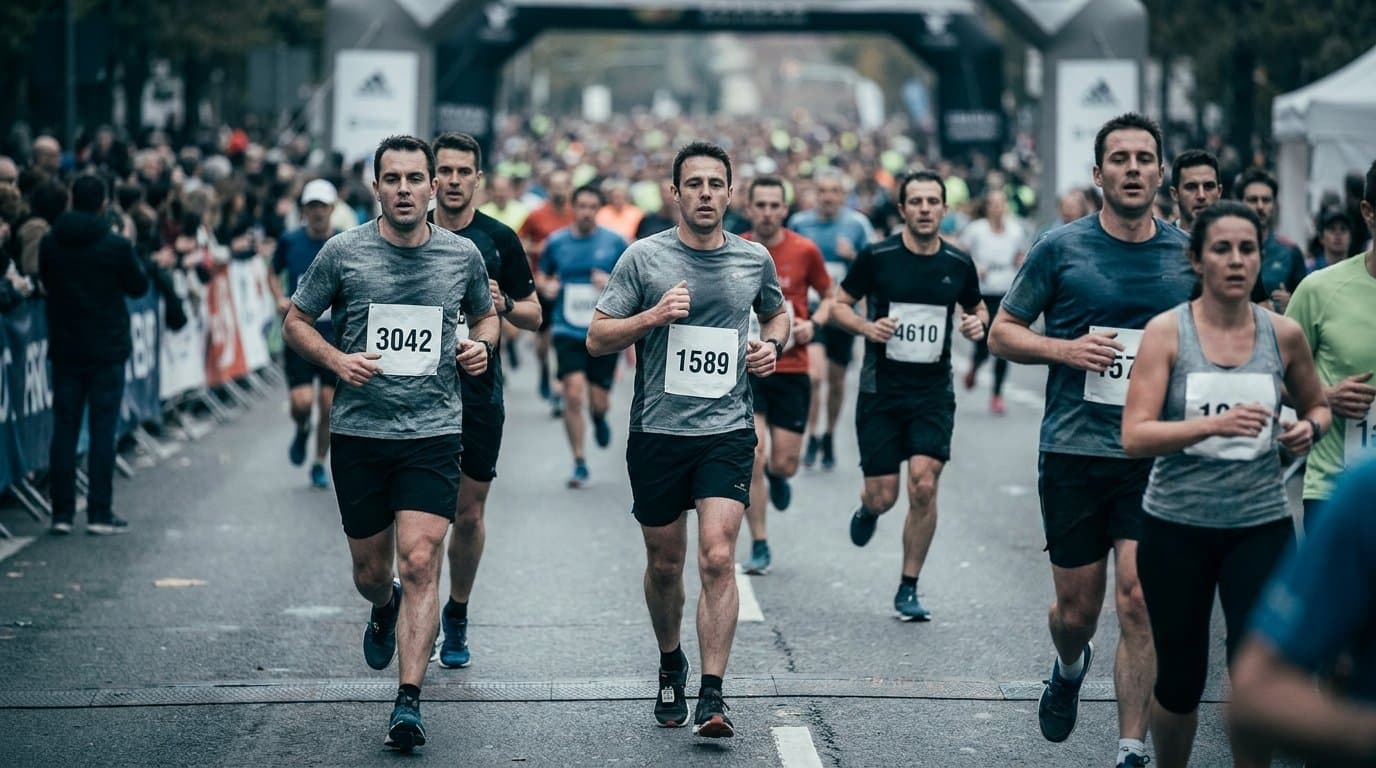
You're back from a half marathon with 4,200 photos and a start list with 1,800 names. Every runner has a bib pinned to their chest. The gallery needs to be up before dinner.
Matching bib to name by hand will take most of your afternoon. Bib detection can do the same work without you in the room — but only if the setup is right for this event type. This is the setup guide for the two most common mass endurance scenarios: road marathons and gran fondos (mass-participation sportives, not professional road races).
What makes these events different
Before the workflow, it's worth understanding what makes marathons and gran fondos distinct from each other — and from motorsport.
At a circuit race, car numbers are large, rigid, painted in a fixed position on the vehicle. Detection is forgiving: the number isn't going anywhere, and scale is big.
At a marathon, bib numbers are paper pinned to a moving torso. They flex, fold, get wet. The good news: at a marathon finish line, almost every runner is facing forward — bib front-and-center, decent contrast, good light. That's the optimal setup for bib detection, and the finish line is the highest-yield position in any road running event.
Mass-participation gran fondos and sportives add one layer of complexity. At these events — not professional road races — participants typically pin bibs to the front of the jersey or wear them on a number belt at the waist. That makes them readable from the front, same as a runner. The detection setup is similar. The challenge is peloton density: in a mass-start pack, bibs face sideways, arms occlude numbers, and depth of field turns rear-group riders into blur. Neither scenario is unsolvable, but they respond differently to where you shoot.
Three positions that actually pay off
Not all shooting locations are equal for bib detection. Prioritize these:
Finish line. This is the single highest-return position at any mass endurance event. Marathon runners cross facing the camera, often slowing down, arms raised — bib front and center, frequently in the best light of the shoot. Gran fondo riders arrive individually or in small groups, even more readable. Every photo you take here is a high-confidence candidate.
Mid-course checkpoints on a straight. Water stations, mile markers, a straight section before a major climb: runners and cyclists are spread out, moving at pace, and facing forward. Not as clean as the finish, but far better than mass-start density.
The final climb (gran fondo). Pace drops, peloton fragments, riders separate. The bib is visible from the front, the rider isn't in a compressed aero position. If you shoot a gran fondo and can only be in two places, put the finish line and the hardest climb on your list.
What to avoid as a primary detection source: mass start photography and early peloton shots. Worth shooting for context and atmosphere, but expect more low-confidence results where bibs are hidden, sideways, or eight riders deep. The finish is where your delivery photos come from.
Setting up in RaceTagger
Get the start list before the event. The participant CSV is your most important asset. A clean file with bib number, first name, last name, and category gives the matching engine a bounded set of numbers to work against — rather than treating any digit sequence as a possible result. Most official marathons export start lists via the timing company; race directors will usually provide one if you ask a day before. Get the final list, not the pre-registration snapshot — entries and bib numbers shift until packet pickup closes.
Sport category: Use the Running category for road marathons and half marathons. Use the Cycling category for gran fondos and sportives. The categories calibrate detection thresholds for each discipline — using the wrong one means the model is tuned for the wrong number style and bib type.
One credit = one photo analyzed. A 4,200-photo marathon uses 4,200 credits. Check your balance before you start the batch — not mid-analysis.
What the analysis does
The recognition engine reads context across the full image — bib position, surrounding visual information — not just isolated character crops. When a bib is partially folded or motion-blurred, this gives the model more signal than a character-by-character pass on a tight crop.
Photos the engine is confident about go straight through. Photos that are ambiguous — folded bib, partial occlusion, motion blur — surface in the review queue. Mislabeled photos are worse than untagged ones: the wrong name goes to the wrong person, and that's not a small problem when the gallery is public. The confidence score is what separates "done" from "needs a second look."
The review step
The review pile will always exist at mass events. Its size depends on conditions:
- Clean light, finish-line shots: small review pile, mostly confirmations
- Wet mountain gran fondo, crumpled bibs, low contrast: larger review pile, more corrections
- Muddy bibs at a rainy event: no workaround other than better source material — but the photos needing review are flagged, not silently tagged wrong
The review isn't "check every photo." It's "check the fraction the engine isn't sure about." At a well-shot marathon with most photos from the finish line, that fraction is a manageable batch — not your entire card.
Same evening delivery
Once analysis is complete, RaceTagger writes the results into each photo's metadata: EXIF, XMP, and IPTC fields. Bib number, matched name, category, team if your CSV included it.
From there, Photo Mechanic, Lightroom, or Capture One reads those fields directly. A runner searching for their number finds their photos because the identity is already in the file — you didn't type it there.
For a standard marathon batch, the practical sequence is: set up the project, start analysis, do something else while it runs. When it's done, the metadata is in the files and the review queue is ready. Go through the flagged images — the confident matches are already handled — and export. Same-evening delivery is realistic for most setups, depending on batch size and your connection speed.
The tagging step used to be the bottleneck between the shoot and delivery. At mass events, that bottleneck is the most expensive one, because the scale is largest. Removing it doesn't change how you edit or where you deliver — it changes when.
Practical checklist
Before the event:
- Request the final start list from the race director or timing company
- Confirm it includes bib numbers (not just chip numbers — they're often different)
- Set up your RaceTagger project and import the CSV
- Select the right sport category: Running for marathons, Cycling for gran fondos
- Check your credit balance against expected photo count
Shoot priorities:
- Finish line first — highest bib yield, best light
- Mid-course straight or technical section second
- For gran fondos: the major climb is your third priority
- Mass starts and early peloton: shoot for atmosphere, not detection
After the shoot:
- Run analysis on the full batch
- Review the low-confidence queue (not every photo — just the flagged ones)
- Export metadata to Photo Mechanic, Lightroom, or Capture One
- Build searchable galleries by participant
On wet or muddy bibs: Water and mud reduce contrast between number and background. Road cycling in rain, trail running, and cyclocross will produce more low-confidence detections. There's no technical workaround — but the affected photos will be clearly flagged, not silently mislabeled.
On same-day delivery pressure: The cleaner your source material — finish-line focus, correct CSV, right sport category — the smaller your review pile, and the faster your turnaround. The setup decisions made before the event determine the delivery speed after it.
Try it on your next event. Download RaceTagger free → — import your start list, pick the sport category, and run your first batch on the free credits you get when you sign up.